This article explains the legacy version of WAF Essential that will undergo end-of-life on June 30, 2021. Our new version of WAF Essentials expands upon all of the capabilities offered by the legacy version of WAF Essential with a simplified and centralized setup. Please upgrade to the latest version of WAF at your earliest convenience.
The following information is only applicable for the WAF Essential product. This security offering provides limited Web Application Firewall and Rate Limiting functionality.
WAF Essential allows customers with basic security needs to leverage our powerful security solutions to protect their origin servers. WAF Essential allows you to create up to 2 profiles, 1 instance, and 3 rate limiting rules at any given time. This is sufficient to set up a dual WAF configuration through which you may validate a new WAF configuration without compromising the security of your origin servers.
WAF Essential cannot be configured via our APIs. However, you may leverage our APIs to retrieve WAF and Rate Limiting event log data.
Enterprise customers typically find the above limitations too constrictive when tailoring security to fit their business needs. Additional profiles, instances, and rate limiting rules provide the flexibility to tailor your security configuration by traffic profile.
Please contact your CDN account manager to upgrade to the full version.
This tutorial provides step-by-step instructions on how to:
- Set up a security configuration to protect your web servers.
- Apply the above security configuration to your traffic.
- Optional. Define and apply the rate at which your traffic may be requested.
- Monitor your traffic for violations.
Step 1: Setting up a Security Configuration
Setting up a security configuration to protect your web servers consists of defining criteria for determining whether traffic is unwanted or malicious. This requires creating a profile that determines the criteria for identifying unwanted or malicious traffic and an instance that determines the action that will take place upon detection of unwanted or malicious traffic.
Navigate to the WAF Manager Page
Administer profiles from the WAF Manager page.
Navigate to the WAF Manager page.
Create a Profile
A profile defines the type of requests that will be considered malicious.
Click Add Profile.
Assign it a Name
The name assigned to a profile is solely used to identify it.
In the Name option, type My Profile.

Assign a Security Level
Assign a security level to your profile to determine when a request will be treated as malicious traffic. A low security level will reduce false positives, while a high security level will provide the most amount of protection.
Navigate to the Policies tab by clicking on it.

Verify that the Ruleset option is set to ECRS 2019-02-11.
Verify that the Security Level option is set to Medium.
It may be necessary to adjust this setting once site traffic has been screened with this profile. Monitor the dashboard for false positives or undetected malicious threats. Adjust this setting accordingly to fine-tune traffic screening.
Verify that the enabled threat detection policies will not interfere with legitimate site traffic.
Consider disabling threat detection policies that are inapplicable to your site. For example, if your site does not leverage Apache Struts, then you should clear the Adv Struts policy.
Save Your Profile
Save your profile configuration by creating it.
Click Create Profile.
Define an Instance
An instance serves the following two purposes:
- Identifies profiles that may be applied to production traffic.
- Determines how unwanted traffic is handled.
In the Name option, type My Instance.
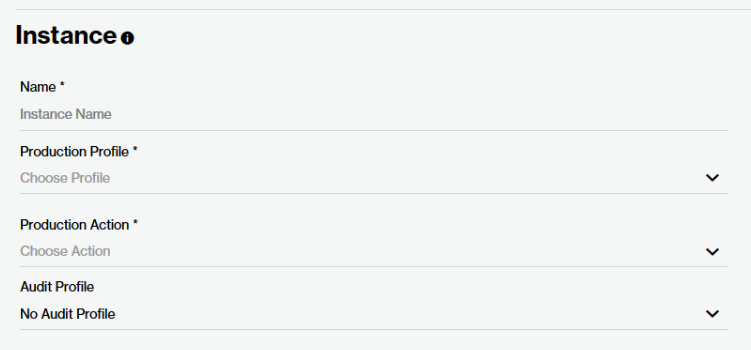
In the Production Profile option, select the profile created above.
Set the Production Action option to Alert Only.
This mode generates dashboard alerts whenever a request is categorized as unwanted or malicious traffic. Leverage this mode to verify that legitimate site traffic will not be impacted by this WAF profile.
Save Your Changes
Create the instance by saving your changes.
Click Save.
Step 2: Applying a Security Configuration
Secure site traffic by activating the newly created instance via Rules EngineAllows the customization of how requests are handled by our CDN service. It may be used to override the default response provided by an origin server, CDN settings, and the default edge server behavior.'s Web Application Firewall feature. The rule containing this feature determines the set of requests that will undergo WAF monitoring.
Navigate to the Rules Engine Page
Rules Engine identifies one or more types of requests and the actions that will be applied to them. This tutorial demonstrates how to create a rule that activates the Web Application Firewall feature for all requests.
Navigate to the Rules Engine page.
Set up a Draft
Instructions on how to create a draft vary according to whether a policy has been previously deployed to the Production environment.
The Rules Engine home page will indicate whether a policy has been previously deployed to the Production environment.
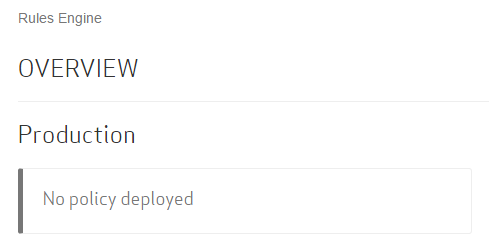
Perform either of the following procedures:
-
 Initial Setup
Perform these steps if a policy has not been previously deployed to the Production environment.
Create a Draft
A draft provides a workspace through which you may define how requests will be handled. In this case, we will be configuring it to apply WAF monitoring to all requests.
From the Drafts tab, click on the
 icon.
icon.
From the Create Draft page, type WAF Essential - My Profile Activation.
Click Continue to save the new draft.
Add a Rule
Add a rule to the draft that identifies the type of requests that will be monitored by WAF.
Click
 .
.Click
 and then select Match.
From the General category, select Always.
Directly below the match condition created in the previous step, click
 and then select Feature.
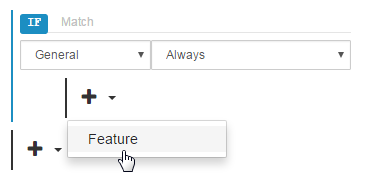
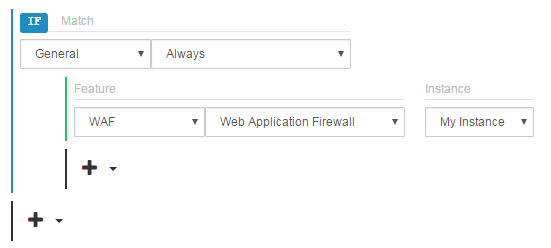
From the WAF category, select Web Application Firewall.
In the Instance option, select the instance created earlier in this walkthrough.
The rule should now look similar to the following illustration.
Click Save.
-
 Subsequent Setup
Perform these steps if a policy has been previously deployed to the Production environment.
Duplicate the Policy
Rules Engine allows you to add or modify the functionality of an existing policy by duplicating it.
Click on the policy deployed to the Production environment.
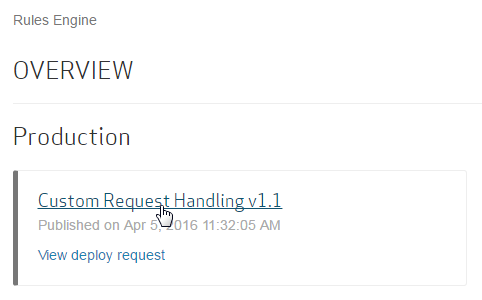
Click Duplicate.
Add the Web Application Firewall Instance
This tutorial applies WAF to all requests by adding the Web Application Firewall instance under the Always match condition.
Click the
 next to the rule whose match condition is set to Always. If such a rule does not currently exist, please create one now.
-
 How do I create this type of rule?
Click
 .
.Click
 and then select Match.
From the General category, select Always.
Directly below the Always match condition, click
 and then select Feature.
Select Web Application Firewall from the WAF category.
In the Instance option, select the instance created earlier in this walkthrough.
Click Save.
-
Lock the Draft
Once a draft has been finalized, it must be converted into a policy. This action is known as "locking the draft."
Click Lock Draft as Policy.
Request the Deployment of the Policy
A deploy request indicates that the policy should be applied to either staging or production traffic.
Click Deploy Request.
In the Environment option, choose Production.
In the Message option, provide a comment that indicates why this deploy request was submitted.
Click Create Deploy Request.
It may take up to an hour to apply a newly approved policy to the Production environment.
Step 3: Defining a Rate Limit (Optional)
Protect your web servers from being overloaded with requests by capping the rate at which requests may be submitted. Requests that exceed the rate limit policy may be dropped, redirected to another URL, or sent a custom response.
Navigate to the Rate Limiting Rules Page
Define a rate limit from the Rate Limiting Rules page.
Navigate to the Rate Limiting Rules page.
Define a Rate Limit
Define a rate limit by indicating the maximum rate of requests and the conditions under which it will be applied.
Click Add Rule.
In the Rule name option, type Catch-All Rate Limit.
In the Apply rate limit to option, select IP address.
This mode applies the rate limit to each unique IP address.
In the Rate limit option, type 300 above the Number of requests caption and select 30 seconds above the Time period caption.
Navigate to the Enforcement tab.
In the Duration option, select 5 minutes.
The action selected in the next step (i.e., alerts) will be applied for five minutes to clients that exceed the rate limit.
Verify that the Action Type option is set to Alert only.
Click Add Rule.
Click Apply All Changes and then Save Changes to save your changes and apply the rate limiting policy to your traffic.
Step 4: Monitor Threats Detected by WAF
Monitor threats via the WAF Dashboard. Utilize this dashboard to assess threats to site and to identify false positives.
Data Gathering
After an instance has been activated, time needs to pass to allow WAF to gather sufficient data from which trends may be detected.
Wait a reasonable amount of time (e.g., 24 hours) after applying your security configuration to your traffic.
Navigate to the WAF Dashboard
View graphs and detailed alert data from the WAF Dashboard.
Navigate to the Dashboard page.
Review Trends
The graph on the WAF Dashboard provides insight into trends at a glance.
Review the graph at the top of the dashboard. Check for an abnormally high number of detected threats.
Analyze Individual Threats
It is useful to view detailed information on detected threats to ensure that WAF is correctly identifying threats.
Click the ![]() icon from the upper-right hand side of the window.
icon from the upper-right hand side of the window.
Click on each alert to view detailed information on it.
- Pay special attention to the requested URL. Verify that it is an illegitimate request.
-
If an alert was generated for a legitimate request, then review the Rule Tags, Matched On, and Matched Value fields to see why the request was flagged.
- Check whether the web application may be changed to prevent this type of request from occurring.
-
If the web application cannot be changed and a significant number of requests will be impacted by this rule, then make a note of the Rule Tags and Rule ID fields. Disable the rule in the corresponding profile.
- The Rule Tags field identifies the threat detection category.
- A search option is displayed in the popup window that appears after clicking the "n Rules Disabled" link next to the desired threat detection category. Search for the rule ID defined in the Rule ID fields. Disable that rule.
- It is strongly recommended to disable the bare minimum set of rules required to serve all legitimate traffic. An additional recommendation is to avoid disabling most threat detection categories.
Step 5: Monitor Rate Limit Violations
Monitor rate limit violations via the Rate Limiting Dashboard.
Data Gathering
After an instance has been activated, time needs to pass to allow Rate Limiting to gather sufficient data from which trends may be detected.
Wait a reasonable amount of time (e.g., 24 hours) after applying your security configuration to your traffic.
Navigate to the Rate Limiting Dashboard
View graphs and detailed alert data from the Rate Limiting Dashboard.
Navigate to the Dashboard page.
Review Trends
The graph on the Rate Limiting Dashboard provides insight into trends at a glance.
Review key statistics (e.g., Client IP and User Agent) to identify key individual offenders.
More Information
